Using the Kickstarter balloon mapping kit
My Public Laboratory for Open Technology and Science (PLOTS) balloon kit came with a bunch of parts:
- a big green balloon
- steel ring
- reusable cable ties
- a carabiner for mooring
- rubber-coated work gloves
- hoop winder and line
- three snap swivels
- rubber bands
The included instructions provided some helpful tips, but a few important things were left to the imagination.
In a big way, that's okay. After a bit of fretting — why do they say there's a spare swivel clip when I seem to need all three…? — it dawned on me that the goal was simply to get my camera a thousand feet into the sky (and back again). The kit provides a good set of high quality materials to git'erdun.
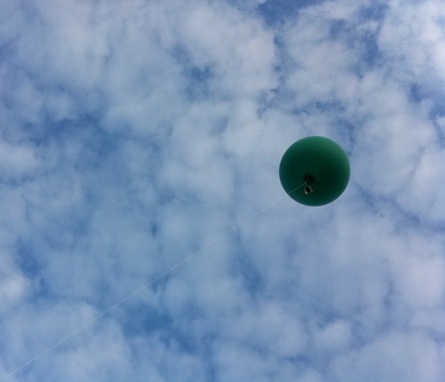
The airship
Helium
Unless you want to mess with hydrogen as a lifting gas, and you don't, you'll need some helium to get your little ship in the air. A party store or supermarket might have some, or call up local "welding supply" and "industrial gas" dealers since you'll be needing plenty. The Industrial Gas Suppliers Alliance has an online directory of members organized by state. In the Tri-Cities area I'd recommend the Oxarc store near the train yard in Pasco, as the staff has been friendly and helpful.
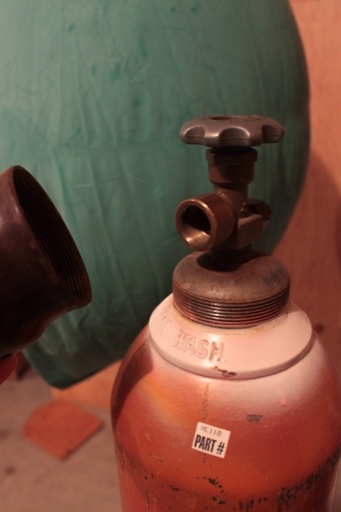
Helium is sold by volume, and they have a variety of tank sizes available. The PLOTS kit's 5.5ft balloon has a maximum capacity of 87 cuft of helium (that's over 5.5 lbs gross lift!) but can get a lighter payload airborne with significantly less gas. I went with their 110 cuft tank so I could . At current prices, they charge around $60 to fill this size. They do loan tanks for just a few dollars on top if you'll return them promptly, but after doing that once I "bought" a tank for in the ballpark of a hundred dollars (almost a glorified deposit, as you simply exchange tanks for a refill, and can sell it back when you're done). This way I can have it handy whenever better weather returns, and also keep it around until I've emptied it completely — whether you buy or borrow the tank there's no refund for leftover gas.
Filling and closing
All you really need is the helium canister and a first officer to help with the whole flight. (It'd be possible to balloon alone, but riskier and way less fun!) The Grassroots Mapping guides cover the pre-flight and filling steps reasonably well, e.g. test the canister valve first and whatnot.
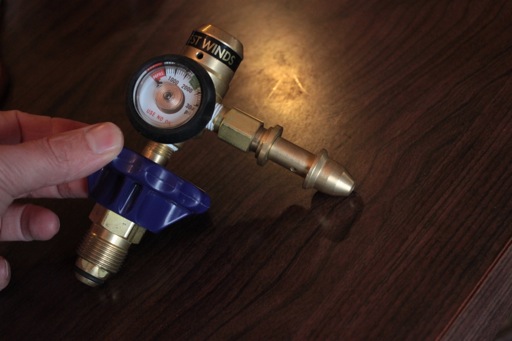
Oxarc is loaning me this regulator until they can track down and order whatever "backroom part" they replaced the filling nozzle with. It's really not a necessary expense — when I fill the big balloon it goes straight on the valve built into the tank. Using the tank valve directly speeds the process while still providing enough control over its 2000 psi contents. I'm splurging on the regulator set just to better monitor the fill level, and to make the tank more versatile for smaller balloons.
One last note on the helium tank: see that metal lid I'm holding in the first picture? That's called a safety cap. For a reason. Make sure it's securely in place whenever you move/transport the tank or balance it upright. If that top valve gets cracked off, there's a good chance you'll quickly have a much more dangerous freezing-cold steel airship flying through your garage. Respect the pressure.
Fill the balloon at a moderate pace. If you're too impatient you'll just put extra strain the chloroprene. Soon after you start, the balloon will be able to lift its own weight so it's best to communicate well with your helper so the balloon doesn't get loose. The balloon's diameter will correspond to the lift you're aiming for (you can find Lift Tables scattered around) but as you're filling its almost easier just to pay attention to the tug you're getting.
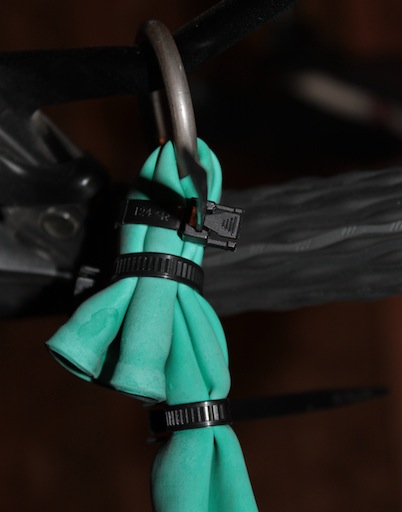
Read the step-by-step instructions for this closing method, but it's pretty self explanatory from the pictures. The kit's zip ties are reusable — very nice for later refills, though I tend to bump the release clips as I tighten them down.
As soon as you've got the balloon tied up you'll want to moor it: tie a piece of kite line between a milk jug (or two if it's breezy) and the carabiner, then gently clip it onto the ring. That way you can turn most of your attention to the final camera setup and fastener checks.
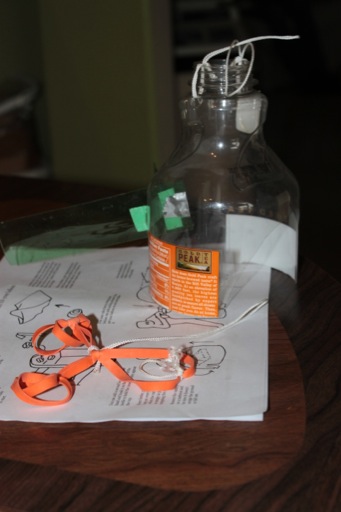
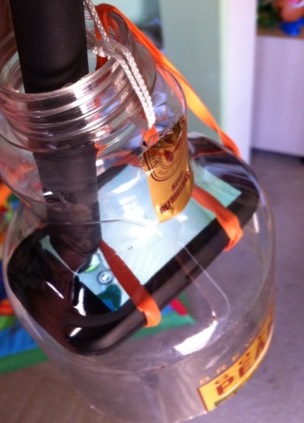
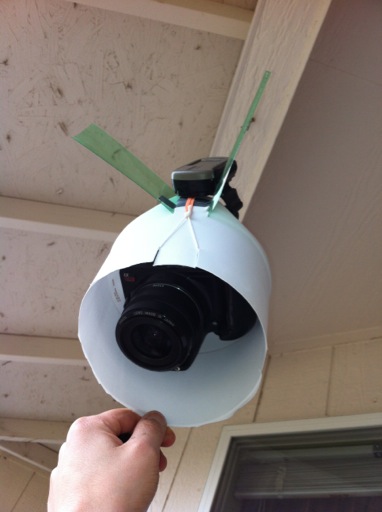
A payload
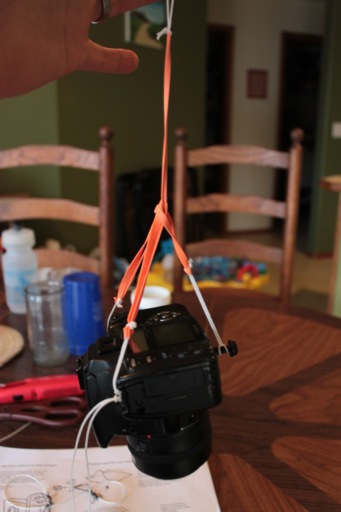
PLOTS has a series of videos and photos demonstrating how to secure a smartphone or camera inside a plastic bottle. I followed the basic process for my Palm Pre 2 (plus some trimming to improve the view) and ad libbed a harness for my EOS 350D using the strap loops and a bolt in the tripod mount.
Crash cage design
I suspect the crash cage itself may come into play a little more with kites than balloons, but there are still many good reasons to stick with something inspired by the PLOTS design.
The general strategy is:
- The plastic cage keeps the lines out of your camera rig and provides a bit of a buffer should something involving gravity go wrong.
- Use string loops to gently join rubber bands to anything metal/plastic.
- Include a secondary backup loop in case a rubber band breaks.
- Some sort of fins to create drag on one side of the bottle. This will discourage free-spinning, reducing radial blur (which helps yield better pictures) and also making your series of shots easier to interpret (since the orientation won't be as random).
Again, the main goal is to just get a camera safely suspended in the air.
Various rigging tips
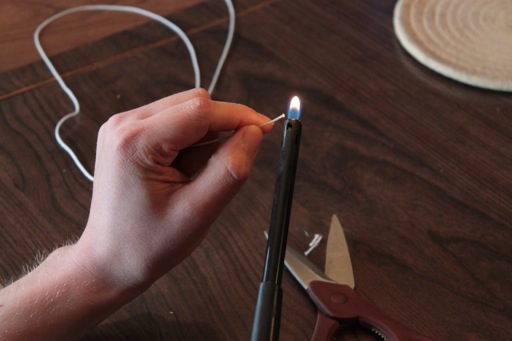
The kite string tends to fray rather quickly once you've cut it. After every cut, I wave a lighter flame near (not directly touching — if it catches fire you're doing it wrong) to heat each of the new ends and gently melt them back.
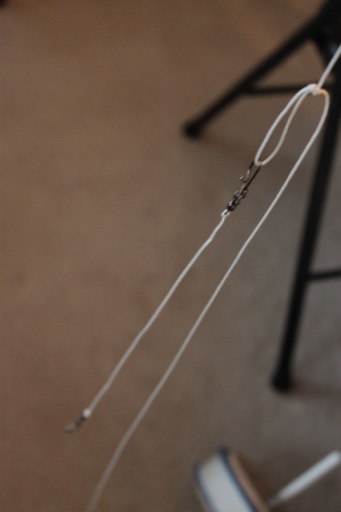
The swivel clips are indeed clips! Don't be tricked. If you put enough force into them they will actually, eventually unclip. Maybe I'm just a wimp, but the rubber gloves (more on those later) do actually help quite a bit here, with the unfastening and refastening of clips.
I'm not quite sure how the PLOTS crew are getting by with only two swivel clips. I have one tied securely on the end of the main spool of line (it's a rather important knot!) and then used the other two on the ends of a few feet of clipped-off string. The main line goes on the kite, and I tie a loop in it where I clip one end of the short line. The other end gets clipped to the two bottle top loops and also the backup camera line. (Unless the band breaks, the full weight of the camera is normally lassoed to the "hook" along the bottle's bottom edge.)
While I've rigged mine a little differently (attaching the main line's swivel clip directly to the ring that's zip tied on the balloon nozzle, and then that double-ended camera rig line to a tied-off loop below that) you may find it helpful to watch Mathew's Launching a Grassroots Mapping Aerial Photography Rig video as well.
Camera notes
Rather than tape down the shutter with a rock, I simply program each camera to take pictures every few seconds.
For my Pre 2, I use Time Lapse Camera along with GPS Tracker in the background. I'd recommend thorough testing with both on the ground first. Learn which buttons do what in GPS Tracker, and when (you only seem to be able to write in-memory GPS logs to its tracks database once). Also note that if you don't give a name to your set in Time Lapse Camera, it will silently overwrite photos in the previous session. For unlocking the phone and starting the camera sequence, it turns out my Cosmonaut stylus has applications in suborbital endeavours too:
The balloon does pretty well with my old Canon Rebel XT (350D) too. I've documented instructions for installing the CHDK-like firmware hack previously, and now would add to that just one note: if you set the interval too short, the hacked firmware may stop snapping mid-flight. I'm pretty sure that it's a "camera memory buffer vs. card speed" issue. Make sure your card can keep up 100%, with my particular card 3 seconds works, otherwise the incoming pictures will slightly outpace the card write speed, eventually (even many many frames later) the buffer will fill, and the hacked intervalometer won't resume until you start pressing buttons back on the ground.
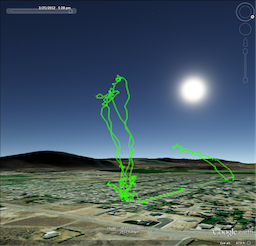
With the balloon filled enough to haul this big rig, I can also strap my lightweight old Garmin Foretrex unit onto the bottle with no noticeable impact. Finally a real use for the sideways visualizations in that "map as fake 3D globe" software!
Don't be afraid to experiment, and also don't be afraid to check your knots and rubber bands one last time before letting the camera go. The constant clicking may be distracting, but remind yourself the camera will have plenty of time in the air too — if it's tied on well.
There and back again
When you're ready, when you've done a low-altitude test flight and then re-checked all the riggings — let 'er rip! The balloon can be really eager to fly and so long as you remain in control it doesn't hurt to let the line off fast. The end of my line was tied to itself around the spool, but you might want to verify yours to make sure. I'm tempted to draw some marks on my line for various altitudes, and to indicate when I need to start slowing the spool down towards the end.
Except for dealing with those swivel clips, I've found the provided rubber-coated work gloves a pain — not only do they literally stink, but they also stink for most rope handling. The rubber is too sticky, and often binds up on the winder and the string causing everything to screech to a halt. Then when the string does get going again, it tends to quickly turn the rubber into sticky blue powder. I do very highly recommend some sort of gloves though. You won't be able to let out or bring back the line well without tearing up your hands. Leather might work nicely, or if you're going for fashion why not try a fine pair of large yellow farmhand gloves?

Now that you've got 1000 feet of line out in the air, it's time to start thinking about how you intend to wind it all back in. But that's another post.
For more information
The other thing I've completely skipped over in this post is what to do with the aerial maps — and occasional landscape photography! — you bring back down.
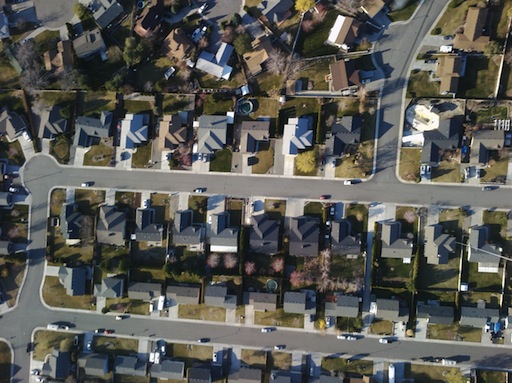
The short answer is "I'm not sure, but they sure are cool!"
I hope this was a helpful overview of one way to use the balloon mapping kit, and also encouragement that it's just a relatively cheap balloon, some string and some rubber bands — hook them together and have some fun! There's even more information and tips and examples and inspiration over at Grassroots Mapping and the PLOTS Research Notes.
Update 2012-April-09: when I first published this post I used a completely made up name for the PLOTS endeavour; somehow I got the name confused with the Public Library of Science. Sorry for such sloppiness. It should be fixed now except for the embarrassing permalink.